Hours: Mon - Sat 24/7
If you’re looking for the best paint brush for cutting in, the answer is straightforward: a high quality 2½ inch angled sash brush with nylon polyester filaments is the brush most professional painters reach for when creating clean lines along ceilings, trim, corners and adjacent walls.
The brush you choose has a direct impact on brush control, paint release, line accuracy and overall finish quality. Even experienced painters struggle to create sharp paint lines when using a poorly made brush. On the other hand, the right brush makes cutting in faster, cleaner and far less frustrating.
Professional painters spend years developing steady cutting in techniques, but they also rely on quality tools. A good brush won’t replace skill, but it can dramatically improve results for homeowners tackling interior painting projects.
TL;DR
- Best Overall Brush: Purdy Clearcut Elite 2½” Angled Sash.
- Best Brush Size: 2½ inch angled sash brush.
- Best Brush Angle: Approximately 45 degrees.
- Best Filament Type: Nylon polyester blend.
- Best Use Cases: Ceiling lines, trim painting, corners, doors and wall edges.
- Professional Recommendation: Invest in a premium brush if precision matters. A quality brush often lasts for years when properly cleaned and stored.

The best paint brush for cutting in combines three key characteristics:
- Angled bristles.
- Medium stiffness.
- High quality synthetic filaments.
Among professional painters, angled sash brushes dominate because they provide better visibility and control when painting along edges.
A quality 2½ inch angled sash brush strikes the ideal balance between coverage and precision. It holds enough paint to work efficiently while remaining narrow enough to maintain clean paint lines.
Many homeowners assume smaller brushes produce better results. In reality, extremely small brushes often create uneven lines because they don’t carry enough paint and require more frequent dipping.
The goal isn’t simply accuracy. It’s consistency. A professional quality angled brush allows painters to maintain a steady wet edge while guiding paint precisely where it belongs.
Why Professionals Prefer Angled Sash Brushes
Walk onto almost any residential painting project and you’ll see angled sash brushes in painters’ hands. There are good reasons for that.
The angled tip naturally follows corners and edges, making it easier to maintain control while painting along ceilings and trim. Benefits include:
- Better visibility while painting.
- Improved edge control.
- More accurate paint placement.
- Smoother paint flow.
- Reduced hand fatigue.
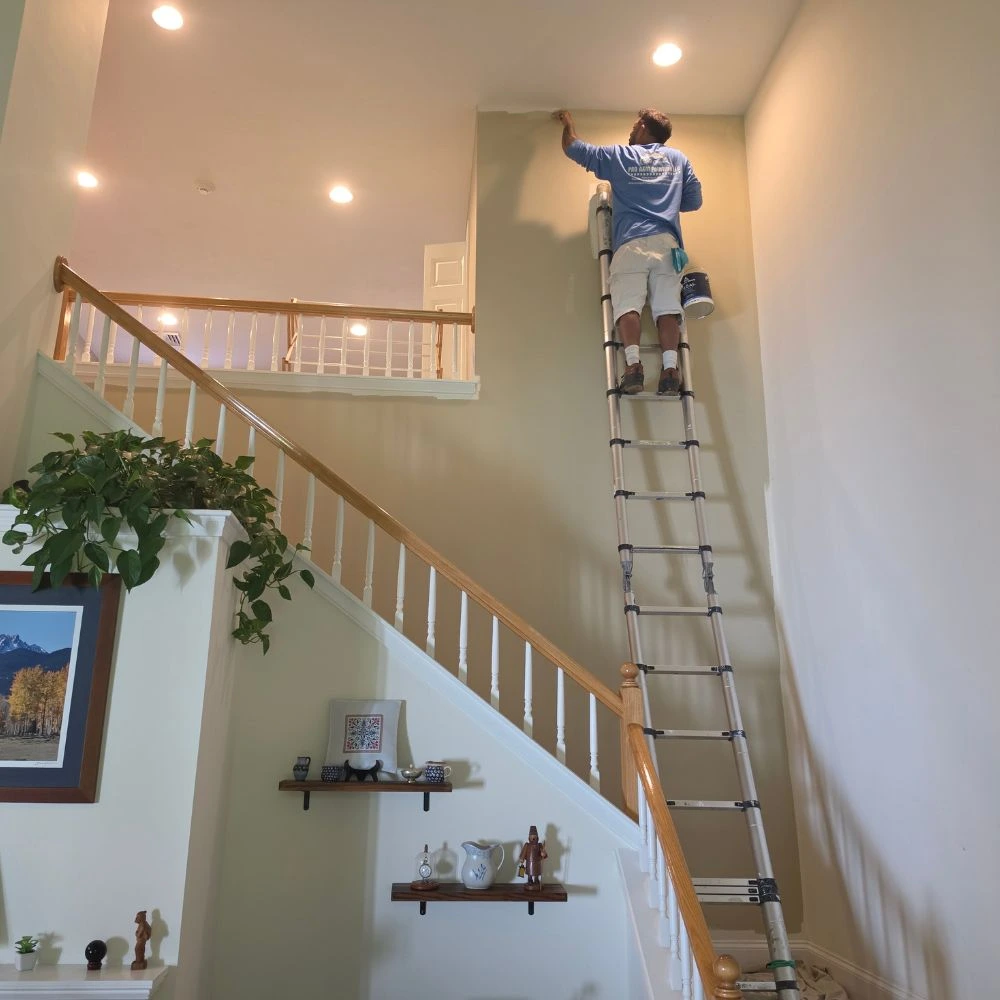
For example, when cutting along a white ceiling above a dark accent wall, the angled tip allows the painter to watch the leading edge of the brush throughout the stroke. That visibility is one of the biggest advantages of an angled sash brush.
Features That Matter When Choosing a Cutting In Brush
Not all paint brushes perform equally. Several design elements directly affect cutting in performance.
1. Brush Angle
The angle of the bristles influences control and precision. Most professional angled sash brushes use a moderate angle that helps guide paint into corners and edges. A properly angled brush allows you to:
- Follow ceiling lines more accurately.
- Cut around trim more easily.
- Reach inside corners.
- Maintain consistent brush contact.
Excessively steep angles can feel awkward, while brushes with minimal angle often lose some of their precision advantage. For most painting situations, a traditional angled sash design remains the best option.
2. Brush Size
Brush size matters more than many homeowners realize. Common sizes include:
- 1½ inch
- 2 inch
- 2½ inch
- 3 inch
For most interior painting projects, 2½ inches is considered the sweet spot. Smaller brushes offer excellent detail control but hold less paint. Larger brushes cover more area but may feel cumbersome during detailed precision painting.
General recommendations:
Project Type
Fine trim details
General cutting in
Large walls
Doors
Brush Size
1½”–2″
2½”
2½”–3″
2½”–3″
A 2½ inch angled brush remains the most versatile choice for homeowners.
3. Filament Material
Filament quality has a huge impact on paint application. Professional brushes generally use synthetic materials because most modern paints are water based. Common filament types include:
Nylon
Advantages
- Smooth finish.
- Excellent flexibility.
- Great for latex paints.
Disadvantages
- Can become too soft in extreme heat
Polyester
Advantages
- Maintains stiffness.
- Durable.
- Good paint control.
Disadvantages
- Slightly less smooth than pure nylon.
Nylon Polyester Brush Blends
This combination is often considered the ideal solution. Benefits include:
- Excellent durability.
- Smooth finish quality.
- Strong paint release.
- Reliable brush control.
Most premium professional paint brush models use some variation of a nylon polyester blend.
4. Handle Design
Many people overlook handle design, but professionals notice the difference immediately. A comfortable handle helps maintain control during long cutting in sessions. Good handle characteristics include:
- Balanced weight.
- Comfortable grip.
- Smooth finish.
- Proper length.
Professional painters may spend hours cutting ceiling lines in a single day. Small comfort improvements become significant over time. For homeowners, handle comfort often translates into steadier brush movement and cleaner results.
Book Your Free Estimate Today!
Ready to transform your space? Our team is here to help you get started with a no-obligation, on-site estimate. Whether it’s a quick refresh or a full makeover, we’ll guide you every step of the way.
Best Paint Brush Types for Different Painting Tasks
The best brush for one task isn’t necessarily the best brush for another. Understanding where each brush excels helps produce better results.
1. Walls
Wall cutting in requires a balance between coverage and precision.
Recommended brush:
- 2½ inch angled sash brush.
Pros
- Excellent control.
- Good paint capacity.
- Fast production.
Cons
- Requires some practice for perfect lines.
When painting walls, professionals typically cut in a border around the room before rolling. This method creates a consistent appearance and helps maintain a wet edge.
2. Ceilings
Ceiling line painting is one of the most demanding aspects of interior painting.
Recommended brush:
- 2 inch or 2½ inch angled sash brush
Pros
- Better visibility.
- Cleaner ceiling lines.
- Greater accuracy.
Cons
- Can be physically tiring overhead.
A common mistake is trying to rush ceiling work. Professionals often slow down slightly when approaching ceiling edges because corrections are far more difficult than careful application.
3. Trim
Trim painting demands precision.
Recommended brush:
- 2 inch angled sash brush.
Pros
- Sharp detail work.
- Better control.
- Smooth finish.
Cons
- Slower coverage.
High gloss and semi gloss trim paints reveal imperfections more easily than wall paint, making brush quality especially important.
4. Doors
Doors require a combination of precision and smooth finish quality.
Recommended brush:
- 2½ inch angled sash brush.
- High quality straight brush for larger flat sections.
Pros
- Smooth application.
- Good paint flow.
- Consistent coverage.
Cons
- Cheap brushes leave visible brush marks.
Professional painters often combine brushing and rolling techniques when painting doors to achieve a factory like appearance.
Book Your Free Estimate Today!
Ready to transform your space? Our team is here to help you get started with a no-obligation, on-site estimate. Whether it’s a quick refresh or a full makeover, we’ll guide you every step of the way.
Professional Painter Recommendations
Choosing the right brush isn’t theory for professionals. It’s based on daily use, cleanup cycles and how a brush behaves after hundreds of linear feet of cutting in. The difference between a decent brush and a reliable one shows up on ceiling lines, inside corners and trim edges where mistakes are obvious.
The best paint brush for cutting in is not a single model for every painter, but there are clear industry favorites that consistently perform well.
Premium Options
These are brushes you’ll see in the hands of experienced interior painters working on high end homes or detailed finish work.
- Purdy Clearcut Elite 2½” Angled Sash
- Wooster Alpha 2″ or 2½” Angle Sash Brush
- Corona Chinex Series Angle Sash Brushes
Why professionals choose them:
Extremely consistent paint release. Clean snap back of bristles after each stroke. Excellent edge control for ceiling line painting. Durable enough for repeated cleaning cycles.
The Purdy Clearcut Elite is especially known for its stiffness balance. It doesn’t flop under pressure, which matters when you’re pulling long, straight lines along uneven drywall edges.
Corona brushes, especially Chinex filament models, are favored for heavy duty jobs where paint consistency varies or when working with slightly thicker coatings.
Mid Range Options
Mid range brushes are where most serious DIY homeowners should focus. They deliver professional results without premium pricing.
- Wooster Shortcut Angle Sash 2″
- Purdy XL Series 2½” Angled Brush
- Benjamin Moore Ultra Spec Brushes (contractor line)
Best for:
- Interior wall painting.
- Trim painting.
- Homeowners improving brush control.
Strengths:
- Solid control without being too stiff.
- Easier cleanup compared to ultra premium brushes.
- Reliable for latex interior paints.
Weakness:
- Slightly less precision on ultra fine cutting in compared to premium brushes.
These are the brushes many professionals keep as backups or use for less critical surfaces like primer coats or secondary rooms.
Budget Options
Budget brushes have a place, but expectations must be realistic.
- Generic angled sash brushes from hardware stores.
- Entry level contractor packs.
Best for:
- Practice work.
- Primer application.
- Low visibility areas (closets, garages).
Pros:
- Low cost.
- Easily replaceable.
Cons:
- Bristles splay quickly.
- Inconsistent edge quality.
- Poor paint control on fine lines.
A cheap brush is often the reason homeowners struggle with clean paint lines during cutting in. The issue is rarely technique alone. It’s often the brush failing to hold a straight edge under pressure.
Book Your Free Estimate Today!
Ready to transform your space? Our team is here to help you get started with a no-obligation, on-site estimate. Whether it’s a quick refresh or a full makeover, we’ll guide you every step of the way.
Common Cutting In Mistakes That Ruin Paint Lines
Even with a good brush, technique determines the final result. Most failed cutting in work comes down to a few repeated mistakes seen on job sites.
1. Using the Wrong Brush
This is the most common issue. A flat brush or worn out round brush cannot produce controlled edge work. It spreads paint unpredictably, especially along ceilings and trim joints.
Signs of the wrong brush:
- Feathered or fuzzy lines.
- Paint bleeding onto ceiling edges.
- Uneven thickness along trim.
Fix:
Use a properly angled sash brush designed specifically for precision painting. The best paint brush for cutting in is always angled for a reason. It’s not a design preference. It’s functional control.
2. Overloading Paint
Too much paint is one of the fastest ways to lose control.
When the brush is overloaded:
- Paint seeps under edges.
- Lines become unstable.
- Drips form at corners.
- Coverage becomes inconsistent.
Professional approach:
Dip only about one third of the bristle length into paint. Tap, don’t wipe. Wiping removes too much paint and ruins flow consistency. A controlled brush load creates sharper, more predictable lines.
3. Poor Brush Angle
Angle control is often underestimated. Holding the brush too flat against the wall leads to:
- Wide, messy edges.
- Loss of precision.
- Increased touch ups.
Holding it too vertical causes:
- Scratchy lines.
- Poor paint transfer.
- Visible streaking.
Correct method:
Maintain a consistent 30–45 degree angle depending on the surface. This allows the bristles to “guide” the paint rather than push it aggressively.
Proper angle control is one of the key reasons professionals achieve consistent cutting in results without tape.
How Professionals Cut In Without Painter’s Tape
Painter’s tape is often used as a safety net, but experienced painters rely more on brush control than masking.
The best paint brush for cutting in is one that allows freehand precision without relying on tape for accuracy. Here’s the method professionals use on real job sites.
1. Proper Brush Loading Technique
Start by loading paint correctly:
- Dip only the tip and lower bristles.
- Avoid pushing the brush deep into the can.
- Lightly tap excess paint on the container edge.
- Maintain a consistent paint load throughout the job.
Consistency matters more than quantity. Every reload should feel identical.
2. Hand Position
Hand placement determines control.
Professional grip:
- Hold near the ferrule (metal base).
- Keep wrist relaxed but stable.
- Use fingers to guide fine movement.
- Let the arm control longer strokes, not just the wrist.
For ceiling lines, painters often use a slightly extended grip for better visibility along the edge. For trim, the grip tightens for precision.
3. Maintaining Straight Lines
This is where experience shows.
Steps:
- Start slightly away from the edge to establish control.
- Bring the brush slowly into the corner line.
- Use the angled tip to guide paint along the edge.
- Maintain a steady speed, not rushed movement.
- Feather the trailing edge lightly to avoid buildup.
Professionals don’t chase perfection in one stroke. They build a controlled edge gradually across multiple passes if needed. A good brush supports this method by holding shape under pressure and releasing paint evenly.
Book Your Free Estimate Today!
Ready to transform your space? Our team is here to help you get started with a no-obligation, on-site estimate. Whether it’s a quick refresh or a full makeover, we’ll guide you every step of the way.
Frequently Asked Questions
What size brush is best for cutting in walls?
A 2½ inch angled sash brush is the most versatile size for wall cutting in. It balances coverage and control, making it suitable for most interior painting tasks.
Can I use a flat brush for cutting in?
It’s possible, but not recommended. Flat brushes lack the edge control needed for clean ceiling lines and trim transitions.
How do professionals avoid brush marks?
They use high quality synthetic brushes, maintain a consistent paint load and apply steady pressure without overworking the paint after application.
Should I use different brushes for ceiling and trim?
Yes. Ceilings often benefit from a slightly larger angled brush, while trim work is best handled with a smaller, more precise brush.
How long does a good paint brush last?
A professional grade brush can last years if properly cleaned after each use and stored with bristles protected from bending.
Is it worth buying an expensive brush?
Yes, especially for cutting in. A high quality brush directly impacts line sharpness, control and overall finish quality.
Why do my cutting in lines bleed?
Common causes include overloading paint, using the wrong brush angle or working on dusty or unprimed surfaces.
Conclusion
Choosing the right brush is not about brand loyalty. It’s about control, consistency, and finish quality. The best paint brush for cutting in remains a 2½ inch angled sash brush with nylon polyester filaments, balanced stiffness and a comfortable handle designed for long interior sessions.
Homeowners often underestimate how much brush quality affects results. In practice, the difference between a clean ceiling line and a messy edge usually comes down to the tool, not just technique.
For most interior projects, invest in a mid to premium angled brush and learn proper loading and angle control before focusing on speed.
Pro A&M Painting has seen it repeatedly on job sites: better tools reduce errors, shorten cleanup time and produce sharper finishes even for first time painters. The right brush doesn’t replace skill. It amplifies it. And when it comes to cutting in walls, ceilings and trim, precision is everything.